LabGuy's World: 1963 Ampex VR-660
Two Inch Helical Scan VTR
NEW! 02.05.07
NEW PHOTOS! 02.06.08
Ampex VR-660 Two Inch Half Helical VTR and a Memorex
tape!
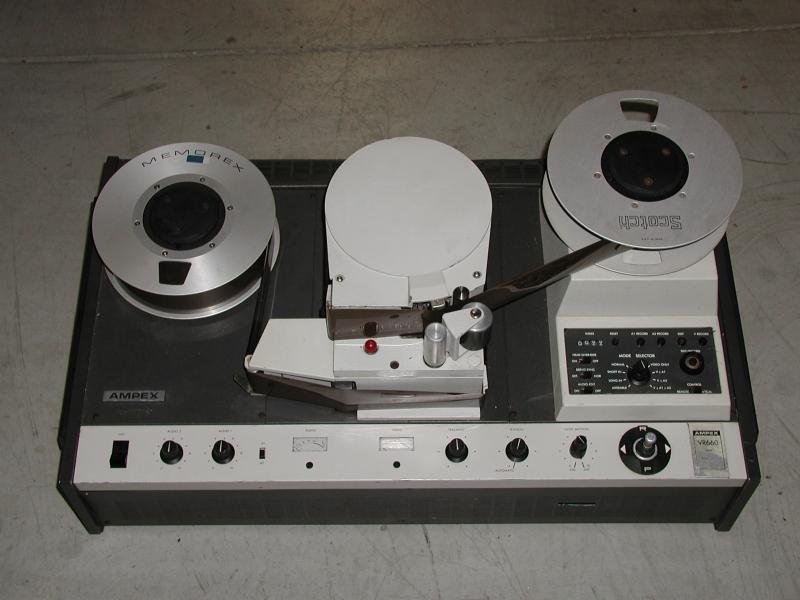    
This is the elusive and rare Ampex VR-660(B?) with Edicon from 1963.
LabGuy's World has been seeking one of these for a very long time. The
first photo is provided by the fellow who sold me the machine. It took
three weeks to arrive, but now it is here for us all to enjoy! Overall,
the unit is in excellent condition considering how long it has been stored.
It did arrive with a couple of show stopper problems. The video heads had
been removed sometime in the past and the drum entry and exit guides are
not complete. I am working with the seller at this time to rectify these
problems. As usual, stay tuned for updates about that. If you have any
spare parts or service literature for this machine, be sure to contact
me!
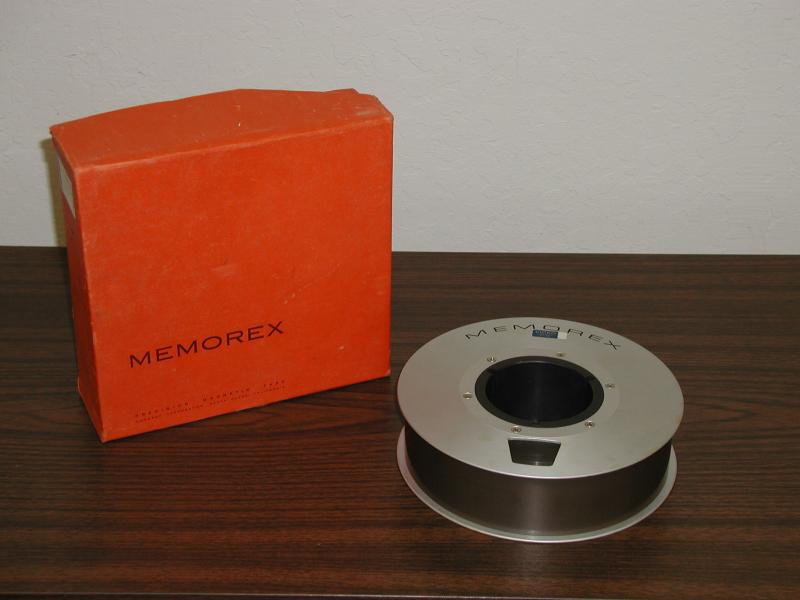
Two Memorex tapes
for the VR-660, as seen in the second photo, were obtained recently from
my newest friend, Grant Newland. Thanks, Grant!
This machine
can accommodate a total of four different reel sizes containing differing
amounts of tape to give the appropriate running times. They were:
-
6. 5 inch reel, 750 feet of tape, 40 minutes.
-
8. 0 inch reel, 1650 feet of tape, 90 minutes / 1 hour
& 30 minutes.
-
10. 5 inch reel, 3600 feet of tape, 195 minutes / 3 hours
& 15 minutes.
-
12. 5 inch reel, 5540 feet of tape, 300 minutes / 5 hours.
(That's over 1 mile of tape!)
Five hours recording time!
Thirteen years before VHS or long playing Betamax? Isn't that fascinating!
And just imagine, the entire film, Titanic, could fit on a single reel
of tape! Again, a dozen or more years before the long play DVD was invented!
And you thought TV was in a primitive state in the early 60s!
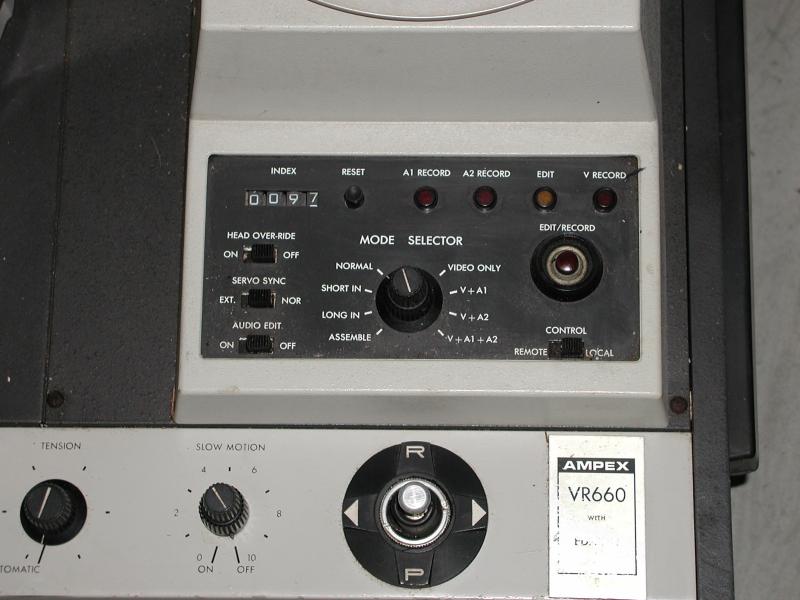
The "Edicon"
is the fancy name for the electronic editing controls built in this machine.
In the early 60s, this was a fantastic feature. From interviewing people
who used these VTRs, I have been told that they worked very well! In the
next to the last photo, you can see the Edicon control panel which allowed
the user ot select |
several different recording
and editing modes. Also visible is the transport control joystick. Sadly,
the ID label is seriously faded, but the word Edicon can be made out with
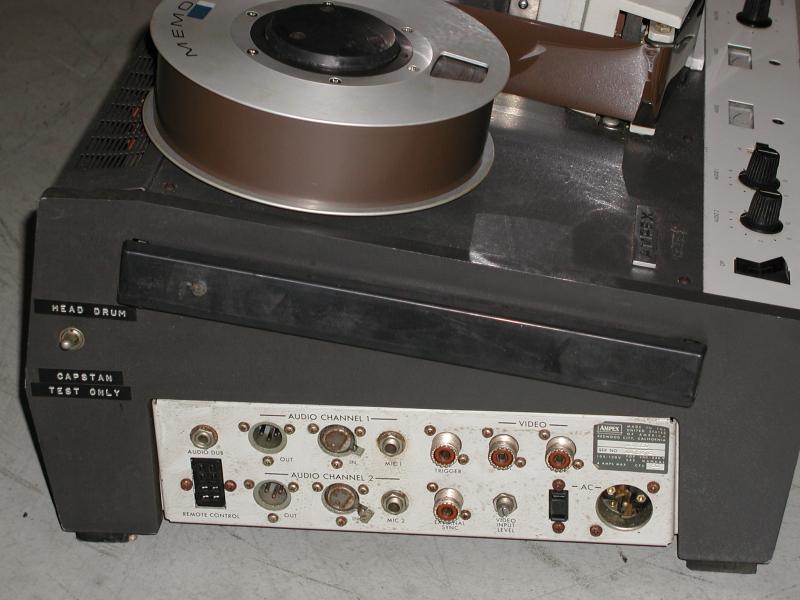
the naked eye. The last photo is of the jack bay.
Ampex produced
another model, the VR-1500, which is interchange compatible with the VR-660.
The VR-1500 was actually marketed, though not very enthusiastically, as
a possible consumer home VTR.
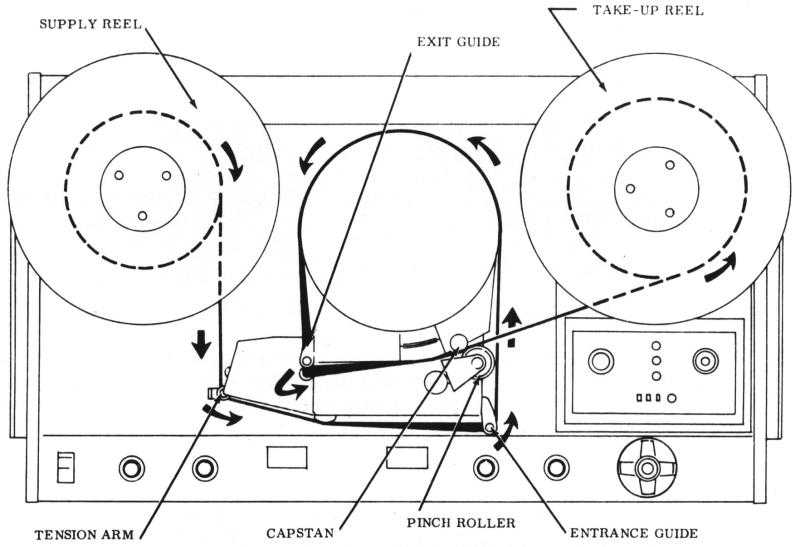
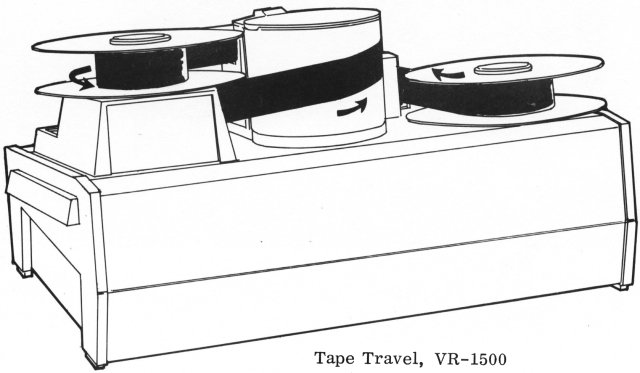
The third
and fourth photos are graphics of the tape threading path on the VR-1500.
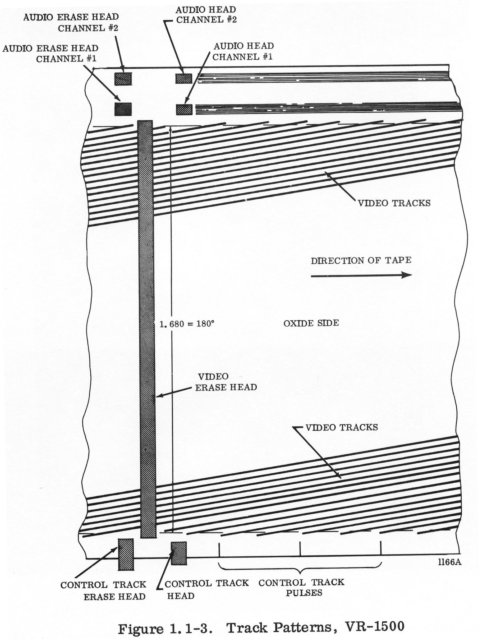
This tape path is identical for the VR-660. The fifth photo is a graphic
of the pattern produced on tape by the VR-1500. The VR-660 conforms to
this same pattern.
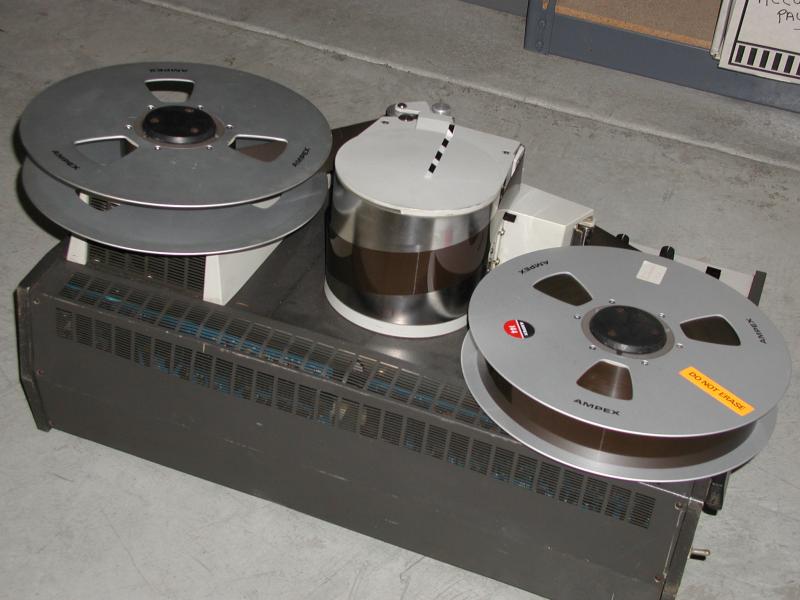
The
bottom row of photos shows the machine as I received it. Grant Newland's
tapes are on it in the first three photos. In the last two photos, I show
the VR-660 with the large reels capable of recording up to five hours!
The very last photo gives a clear view of the tape ascending around the
head drum. That large roll of tape is very heavy. It weighs about 25 pounds!
Thanks to John Pommon, of [Antique
Video Transfer Service] in San Francisco, for the greatest deal on
the large reel of tape and the empty take up reel.
This
machine uses tape that is two inches wide, running at 3.7 inches per second,
wrapped half way around a two head scanner. It supports two independent
audio channels with audio overdub available on one channel. The video bandwidth
is approximately 3 Mhz with a signal to noise ratio of 40 db. Great for
monochrome, a little bit short for color. A later version of this machine,
the VR-660C, was color capable with an external color adapter unit.
Last,
but not least, the VR-660 is 14. 5 inches high X 30 inches wide X 17. 5
inches deep and weighs 100 pounds (45 Kilos). It was a jewel of miniaturization
in its time if you compare it with the mighty Quadruplex!
UPDATE: The missing tape guides are being remanufactured
for me from critical dimensions provided to me by John Turner of [Turner
Engineering Inc.] in New Jersey. Thanks John!
For
a giggle, [CLICK HERE] to see the VR-660s
baby! I guess the unit was pregnant when I got it?
NEEDED: Operator and Service Manuals for the VR-660.
Will trade for a copy of the VR-1500 manual. |
Progress Report: 020618
    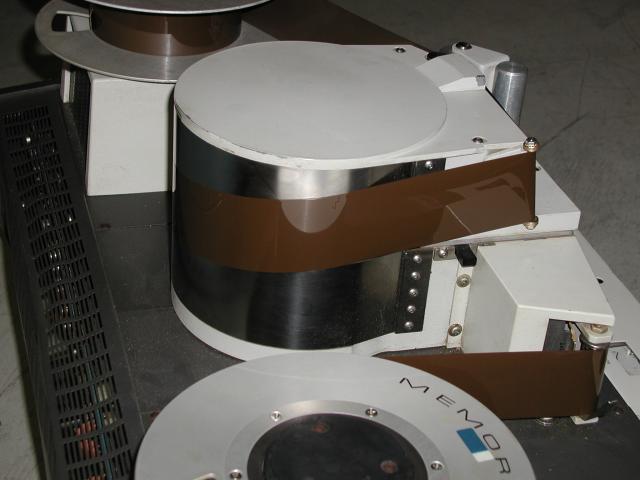
RESTORATION REPORT #1: The VR-660 gets new entrance
and exit guide pins!
With information provided by John Turner, I have managed to get replacement
tape guide pins manufactured for my Ampex VR-660.
What exactly
are entrance and exit guides, LabGuy? I'm glad you asked! These
two guides are the most important points in the tape path on any video
tape recorder. These two guides are responsible for precisely changing
the tape direction so that it follows an absolutely precise path around
the head drum. The first part of that function is to change the tape travel
from a level direction, parallel with the top plane of the transport, to
an angled rise (in this case) taking the tape around the drum in a spiral
or helix. Hence the term, helical scan! The scan part is not helical
only the travel of the tape around the drum. The exit guide performs the
reverse translation as the entrance guide, returning tape travel to its
original horizontal plane.
While the tape
is circumscribing the drum, it must also be positioned so that the prerecorded
video tracks are lying in a perfectly horizontal plane with the video heads.
The heads protrude from a slot around the drum and contact the tape. As
the head disk spins, inside the drum, the heads trace perfectly horizontal
bands across the tape. When the tape is not wrapped around the drum, these
tracks are actually at an angle, relative to the edge of the tape. But,
they should be perfectly straight. The drum guides are mostly responsible
for this precision geometry. Drum roundness, exact centering of the heads
and other factors are also important in achieving perfect tape geometry.
But, these guides are the most important part to restoring this
machine!
Another property
of these guides is their mechanical stability. They need to be precisely
shaped and positioned to do their job correctly. A little too far one way
or another and the tape will not meet the face of the drum correctly. Wrinkling,
riding up or down the drum, edge damage and other geometric horrors can
occur. |
The guides must also be very
hard since the oxide recording surface of the tape will be riding over
them continuously in all transport modes. To soft of a metal and the guides
would wear out in a very short time. The guides must also be non magnetic
so that the tape is not partially or, in extreme cases, completely erased
by passing over them! These guides are made from precisely machined stainless
steel for this job.
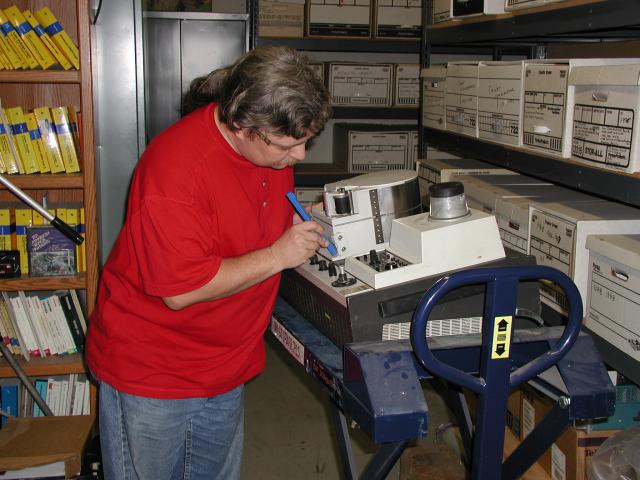
In the first
photo, LabGuy is cleaning the aluminum support bracket for the entrance
guide which is on the bottom. I had to scrape out the old epoxy and clean
the metal surface, removing all dirt and oil that my have been there. I
used an industrial non CFC solvent similar to freon for this part of the
job. The upper guide support got exactly the same treatment. Next, the
guide pins were assembled and cleaned with solvent. The prep work took
most of my lunch hour. As a last step, I mixed up some two part epoxy and
secured the pins to the guides. A couple industrial paper clips held the
pins tightly while the glue set.
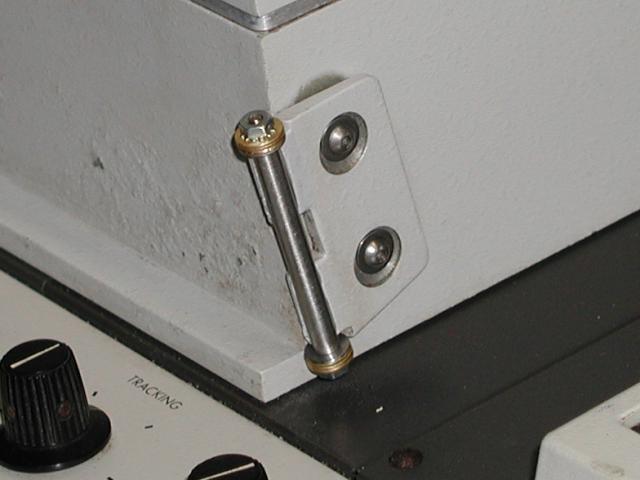
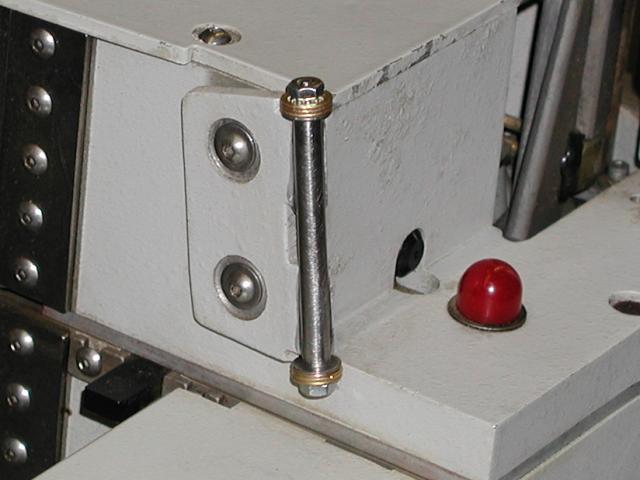
After a couple
of hours, the clips were removed to reveal perfectly installed tape guides!
As can be seen in photos two and three. Barely containing my excitement,
I tossed a reel of tape onto the deck and threaded it up. To my amazement,
I was able to rotate the take reel with two fingers, even though there
are many square inches of tape in continuous contact with the fixed surface
of the drum! The resistance of the tape, to this static surface, is called
stiction.
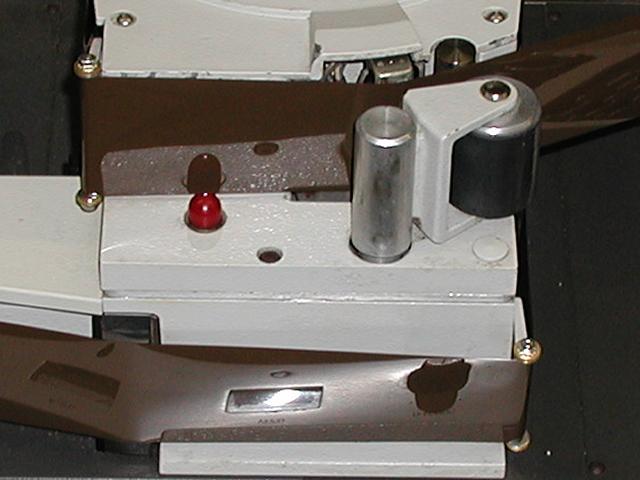
The last two photos clearly show the tape travel around the guides and
head drum. No wrinkles, no creases, no folded edges. It is perfectly good
to continue to the next phase, transport restoration!
LabGuy's World
would like to thank Charley at [ACI
Alloys] for accepting the contract to make these parts. Without your
help, this project would be progressing at a much slower rate! Thanks Charley!
Stay tuned! |
Progress Report: 020913:
RESTORATION REPORT #2: Will Quadruplex VTR heads
work in a VR-660?
|
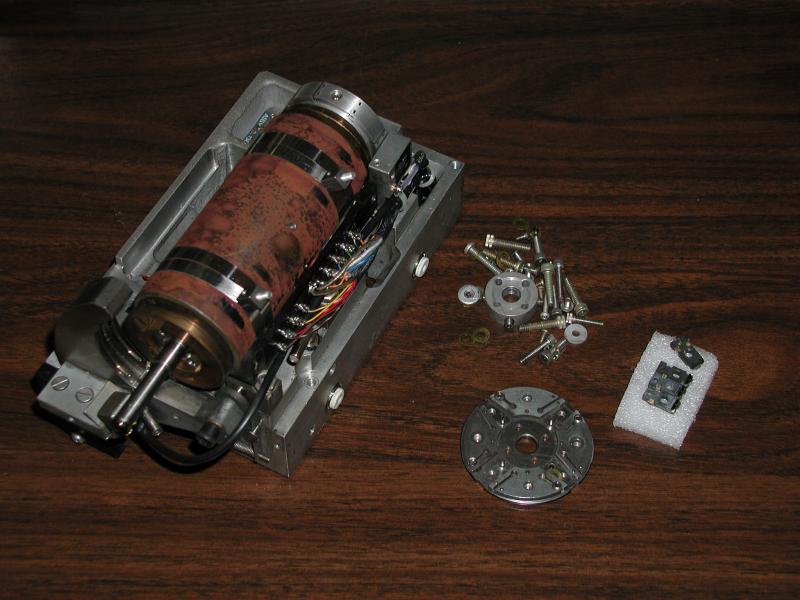
That is the big question, huh? I recently obtained an old Ampex quadruplex
VTR head assembly. Working very carefully, as to not damage the actual
video head tips, I disassembled the unit. In the first photo, you ca see
what was left after my salvage operation. To the left is the main motor
assembly, covered in red iron oxide powder that accumulated under the main
covers. Lower right is the remains of the head wheel. To the right of that
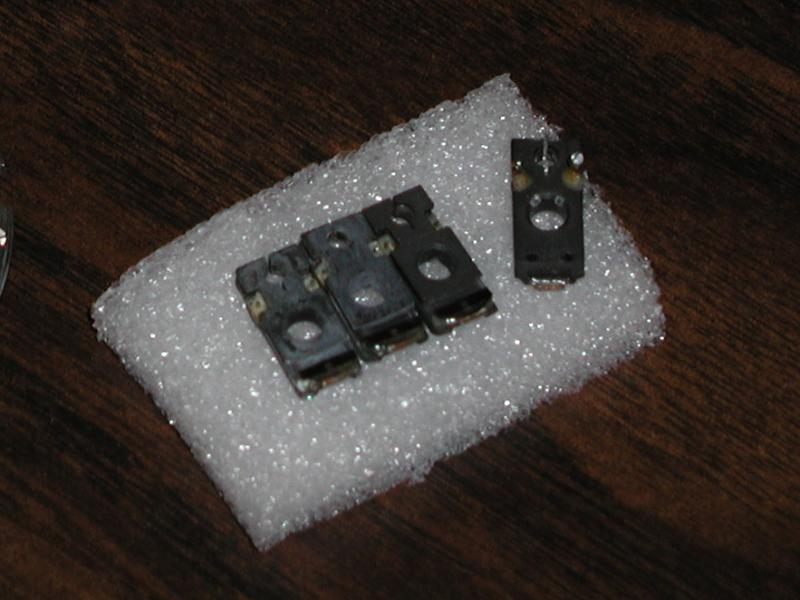
is the four video head "tips", as I call them. |
The second photo is a close up of the individual head tips. Soon as I get
a chance, I will try them in the VR-660. My reasoning is that if Ampex
engineers were designing a whole VTR from scratch, but the company was
already fabricating a large quantity of high quality tape heads, why not
use them in the new design? It is good logic, but nothing guarantees it
is correct.
Stay tuned! |
[HOME]......[VIDEO
RECORDERS MUSEUM]
Last updated: January 09, 2005 |


