|
LabGuy's World: NBTV - 10-4 Eleanor RGBY Color Video Signal Generator Project
[PREVIOUS PAGE] [HOME] [ELECTRONICS PROJECTS] [NEXT PAGE] [1. INTRODUCTION] [2. HARDWARE] [3. SOFTWARE] [5. CONCLUSION] IMAGES ACTUAL SCALE 10-4 ELEANOR IMAGES The four pairs of images depicted above, in color and monochrome, are actually 32 lines wide and 64 pixels tall. From left to right, the images are: Horizontal color bars, Dorothy from Kansas, John Logie Baird and Vertical color bars. These images are presented on your display in a 1:1 scale at the pixel level. Marvel at the amount of detail that can be discerned at this resolution. You can clearly see that they will look great on either color displays or black and white displays, Nipkow disk or cathode ray tube, your choice. And yes, of course, you will be able to add your own images to the EEPROMs in the 10-4 Eleanor. RGB FRAME BUFFER EEPROMS 
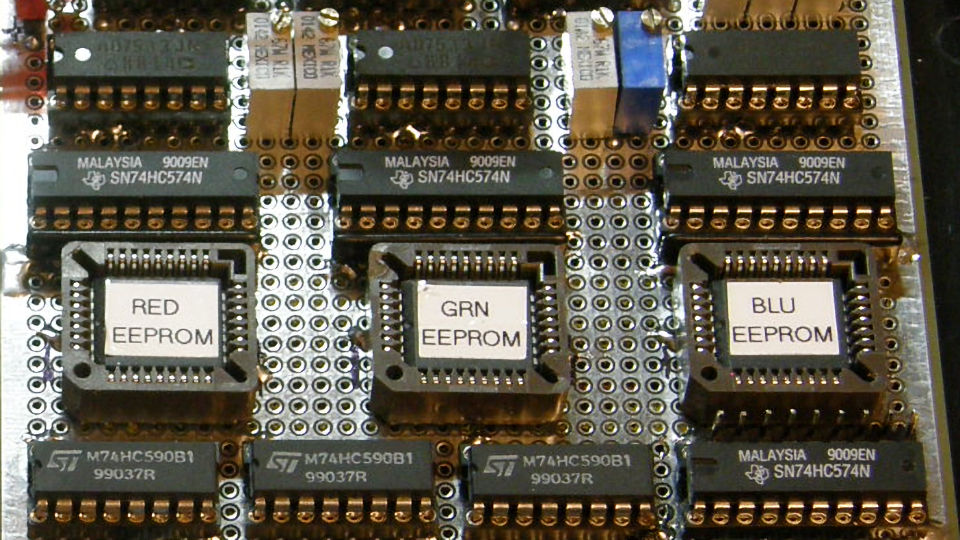
THE THREE IMAGE MEMORY EEPROM CHIPS The images are stored in three memory chips (Silicon Technolgy ST29F040) as discrete red, green and blue frame data. These three chips hold a total of 256 individual full color frames. The software involved is as follows: An image processor like Photoshop or Paintshop. Any image processor will do if it can save images as raw binary files (not JPG, no headers or LUTs). Next, are the two basic programs I have written. Program one creates a set of three default R,G,B files called InitImagesRed.bin, InitImagesGrn.bin and InitImagesBlu.bin. You manually copy these files to three new files called: ImagesRed.bin, ImagesGrn.bin and ImagesBlu.bin. Program two enables you to insert your individual 32x64 pixel color images into the frame buffer files at the indexed positions of your choice. Once completed, the files are programmed into the chips with a standard low cost device programmer. The chips are then placed in the 10-4 Eleanor video board and Robert is your dad's brother. RAW BINARY IMAGES 

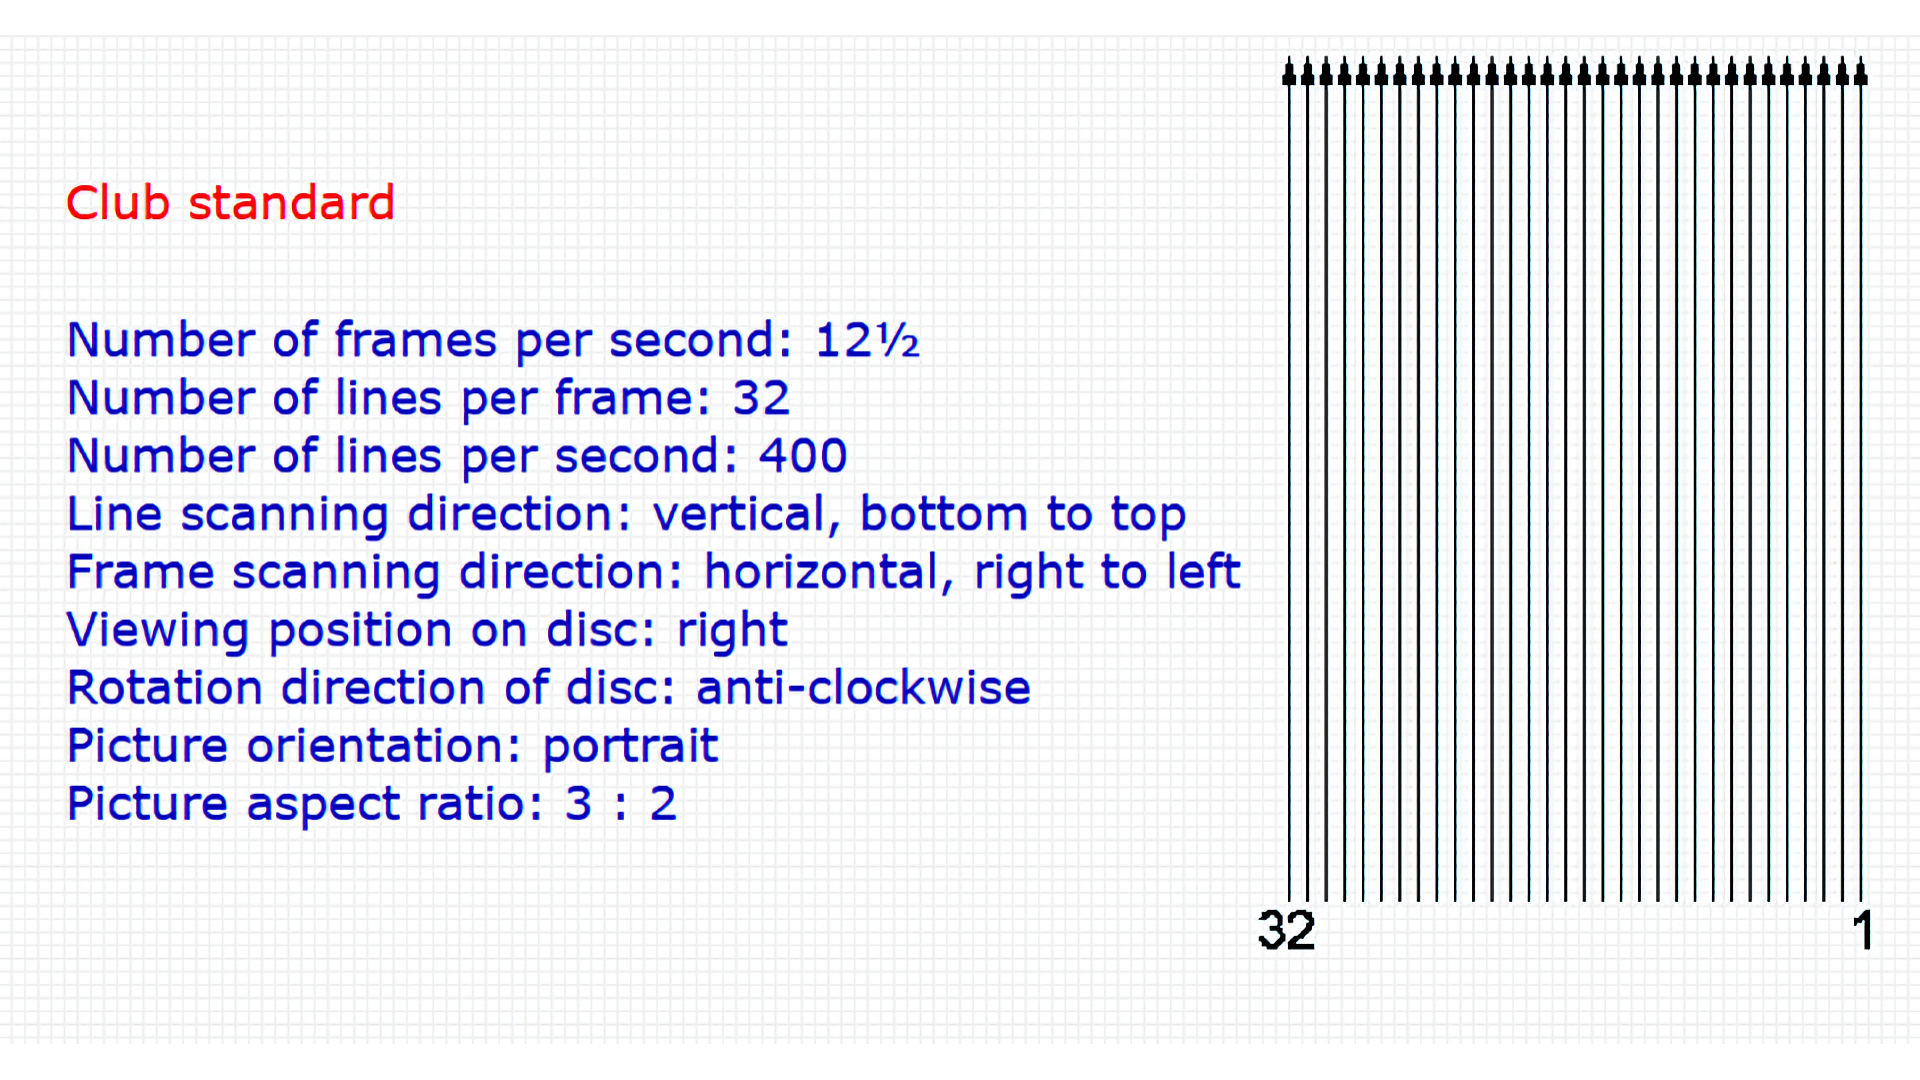
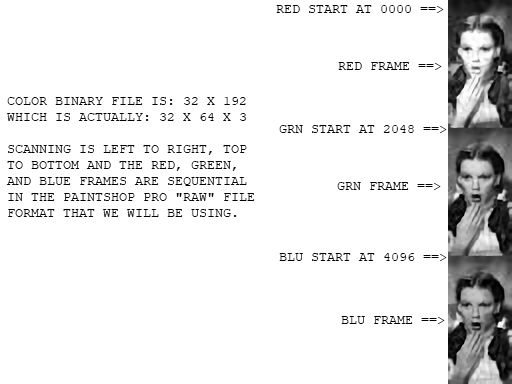
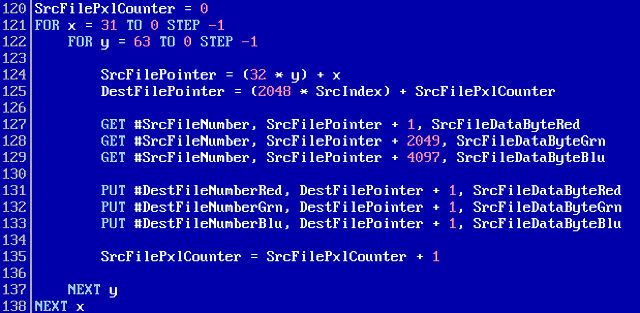
NBTV VIDEO FRAME FORMAT vs STANDARD RASTER SCAN Above is an image of the NBTV scanning format in full detail. You will need to understand that the creation of your images using the modern software will not conform to this format. The computer generated images scan left to right, top to bottom just like television and computer displays. The QB45 program, that I wrote, makes the necessary correction when it reads the source images and writes them into the EEPROM R,G,B files. You don't need to concern yourself with this conversion if you use my QB45 code. However, if you write your own code, you must make sure that you read the data from the source file in the NBTV scanning format and then write it into the EEPROM binary files. FYI: the raw format that I used in Paintshop Pro, writes the red frame first, the green frame second and the blue frame last. So, your code will need three read pointers but only one write pointer. We are reading one file with three frames and writing to three files of one frame (location) each. You will see this geometric tanslation in the source code when you read it. See the example code below: . MERGING THE RAW IMAGES 
THE CORE LOOP OF THE IMAGE INSTALLER PROGRAM This is the most important part of the code that copies individual color images into the EEPROM master binary files. The nested X and Y counter loops scan the pixels from the source file, starting at the lower right (of the image data), scanning upward through all the pixels in that column, then step one column to the left and scan bottom up again until all 32 columns are transferred to the three destination files. One for red data, one for green and one for blue. These are the files that hold 256 frames, in binary, that ultimately get written to the three EEPROMs on the 10-4 Eleanor video board. The variable, SrcIndex is the location index for where to store the incoming image in the final EEPROM space. All of the files used in this project are available for download as a zip file on the [CONCLUSION] page of this article. [PREVIOUS PAGE] [HOME] [ELECTRONICS PROJECTS] [NEXT PAGE] [1. INTRODUCTION] [2. HARDWARE] [3. SOFTWARE] [5. CONCLUSION] |